If you’re looking for a quilt block that’s steeped in history and brimming with possibilities, the Jacob’s Ladder Block – Quilt Tutorial is the perfect pattern for you. Known for its striking geometric design, this block has been a favorite among quilters for generations.
The Jacob’s Ladder pattern dates back to the 19th century and symbolizes a journey of faith, making it a meaningful choice for quilting projects. But don’t let its deep history fool you—this design is as modern as you want it to be.
The Jacob’s Ladder Block consists of simple shapes like squares and half-square triangles, making it accessible for quilters of all skill levels. Whether you’re new to quilting or have been stitching for years, this tutorial will guide you through the process of making this beautiful block with ease.

Plus, the versatile design allows for endless creative possibilities. You can use bold colors for a contemporary look or stick with traditional prints for a more classic feel. Either way, the Jacob’s Ladder Quilt Block is sure to stand out in any quilt.
In this blog post, we’ll walk you through how to create your own Jacob’s Ladder Block step-by-step. We’ll also cover some tips and tricks to make the process even easier and offer suggestions on how to make your quilt unique.
Whether you’re making a single block for practice or assembling an entire quilt, this tutorial will help you master this timeless pattern.
1. What is the Jacob’s Ladder Block?
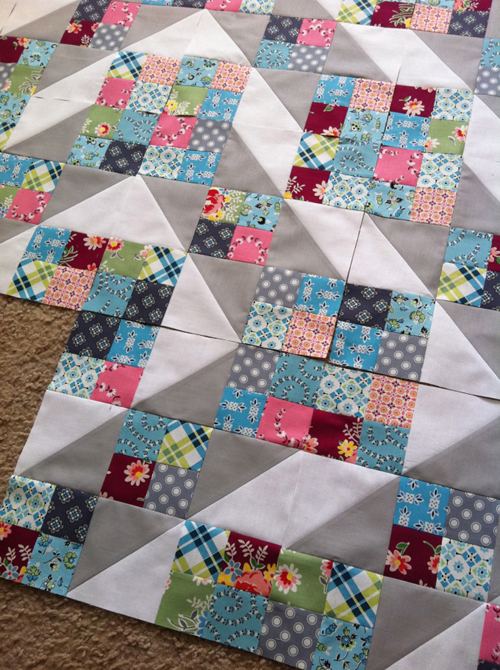
The Jacob’s Ladder Block is a traditional quilt pattern that has been popular for well over a century. Its classic design is made up of squares and triangles, arranged in a way that creates a stair-like pattern, hence the name “Jacob’s Ladder.” The block is built from two simple units: the four-patch unit and the half-square triangle unit. When combined, these two elements create a beautiful, intricate-looking pattern that forms diagonal paths across the quilt.
One of the reasons this block is so loved is its versatility. You can make it in any color scheme, using solids, prints, or a mix of both. Its design can range from bold and graphic to soft and subtle, depending on your fabric choices. This makes the Jacob’s Ladder Block – Quilt Tutorial a perfect project for quilters who love to experiment with colors and patterns.
The Jacob’s Ladder Block is also highly adaptable in terms of size. You can make smaller blocks for a more detailed quilt or larger blocks for a quicker project. The flexibility in size allows you to easily customize the block to fit any project, whether it’s a full quilt, a pillow cover, or a wall hanging.
Traditionally, the Jacob’s Ladder Block was made in two contrasting colors, often using dark and light fabrics to emphasize the stair-like pattern. However, modern quilters have taken this block in many new directions, using bold colors, playful prints, and even asymmetrical layouts to create stunning quilts. The design possibilities are endless.
The Jacob’s Ladder Block is also relatively easy to sew, making it an excellent choice for beginners who want to create a quilt that looks complex but is actually quite simple. Once you’ve mastered the basics of piecing squares and triangles, you’ll find this block to be a fun and rewarding project.
2. Materials and Tools You’ll Need
Before you start sewing your Jacob’s Ladder Block, it’s important to gather all the necessary materials and tools. Having everything organized ahead of time will make the process much smoother and more enjoyable.
First, you’ll need fabric. For a traditional Jacob’s Ladder block, choose two contrasting fabrics—one light and one dark. This contrast will help to emphasize the block’s design. You can use fat quarters, fabric scraps, or yardage, depending on how many blocks you plan to make. If you’re feeling creative, you can even use multiple colors or prints for a more modern twist.
Next, you’ll need a rotary cutter and cutting mat. Accurate cutting is essential for this block, as the design relies on precise squares and triangles. A sharp rotary cutter and a good-quality cutting mat will ensure your pieces are cleanly and accurately cut. Don’t forget to use a quilting ruler to help you measure and cut your fabric with precision.
A sewing machine is essential for this project, but you can also hand-sew the block if you prefer. Make sure your sewing machine is equipped with a quarter-inch foot to help you achieve accurate seam allowances. This is especially important for ensuring that your blocks fit together neatly when you sew them into a larger quilt.
You’ll also need thread that coordinates with your fabric. High-quality cotton thread is ideal for quilting because it’s strong and smooth. Choose a neutral color if you want your stitches to blend in or a contrasting color if you want them to stand out.
Don’t forget to have pins or fabric clips on hand to keep your pieces in place as you sew. A seam ripper will also be useful in case you need to undo any seams.
Lastly, once your block is complete, you’ll need batting and backing fabric if you plan to turn your block into a finished quilt. The batting adds softness and warmth, while the backing fabric completes the look of your quilt.
3. Step-by-Step Guide to Making the Jacob’s Ladder Block
Creating the Jacob’s Ladder Block involves just a few simple steps, but the result is a beautifully intricate-looking design. Follow this step-by-step guide to make your own Jacob’s Ladder block.
- Cut Your Fabric: Start by cutting your fabric into squares. You’ll need four squares for the four-patch units and four squares for the half-square triangle units. The size of your squares will depend on the size of your finished block, but a common size is 4 ½ inches.
- Make the Half-Square Triangles: Pair a dark square with a light square and place them right sides together. Draw a diagonal line from one corner to the opposite corner. Sew a quarter-inch seam on both sides of the line, then cut along the drawn line to create two half-square triangles. Press the seams open or to the side, depending on your preference.
- Assemble the Four-Patch Units: To create the four-patch units, sew two light squares and two dark squares together in a 2×2 grid. Press the seams open or to one side. Make sure to align your seams carefully to ensure the unit lies flat.
- Lay Out Your Block: Once you’ve made your half-square triangles and four-patch units, lay out the pieces in the Jacob’s Ladder pattern. The half-square triangles should form the “steps” of the ladder, while the four-patch units create the solid sections of the design.
- Sew the Rows Together: Sew the pieces together in rows, being careful to match the seams where the blocks meet. Press the seams as you go to keep the block flat.
- Finish the Block: Once your rows are sewn together, press the entire block one final time. Your Jacob’s Ladder Block is now complete! Repeat these steps to make more blocks, or incorporate this single block into a larger project.
4. Creative Tips for Customizing Your Jacob’s Ladder Quilt
The Jacob’s Ladder Block – Quilt Tutorial is incredibly versatile, offering endless opportunities for customization. Here are some tips to help you make your quilt truly unique.
- Experiment with Color: While the traditional Jacob’s Ladder block uses two contrasting colors, don’t be afraid to mix things up. Try using multiple colors or prints to create a more modern, vibrant look. You can also experiment with a monochromatic color scheme for a subtle, sophisticated quilt.
- Vary the Block Size: One of the great things about the Jacob’s Ladder Block is that it can be easily scaled up or down. Try making smaller blocks for a more detailed quilt, or go big for a faster project. Mixing different block sizes within the same quilt can create a fun, eclectic look.
- Add Sashing or Borders: Adding sashing between your blocks or a border around the entire quilt can help to define the design and give the quilt a more polished, finished look. You can use a solid fabric for a classic look or a bold print for something more modern.
- Use Scraps for a Scrappy Quilt: If you have lots of fabric scraps lying around, the Jacob’s Ladder Block is a great way to use them up. Mix and match different prints and colors to create a scrappy, patchwork-style quilt.
- Try Different Layouts: Once you’ve made your blocks, play around with different layouts before sewing them together. You can rotate the blocks to create new patterns or arrange them in a diagonal or on-point layout for a more dynamic quilt.
- Quilting Ideas: Once your quilt top is finished, think about how you want to quilt it. Straight-line quilting will emphasize the clean lines of the Jacob’s Ladder Block, while free-motion quilting can add a more decorative touch.
FAQ
1. What size should my squares be for the Jacob’s Ladder Block? The size of your squares depends on the finished size of your block. Common sizes are 4 ½ inches or 5 inches for a finished block size of 12 inches.
2. Is the Jacob’s Ladder Block suitable for beginners? Yes! The Jacob’s Ladder Block – Quilt Tutorial is perfect for beginners because it uses simple squares and half-square triangles. The block is easy to sew, but it looks more complex than it actually is.
3. Can I make the Jacob’s Ladder Block by hand? Absolutely! While many quilters prefer to use a sewing machine, you can also sew the Jacob’s Ladder Block by hand. Just make sure to use small, consistent stitches for the best results.
4. How many Jacob’s Ladder blocks do I need for a full quilt? The number of blocks you need will depend on the size of your quilt and the size of your blocks. For a standard twin-size quilt, you’ll need around 20-25 blocks, but this can vary.
5. What fabric is best for the Jacob’s Ladder Block? Cotton fabric is ideal for quilting, as it’s durable and easy to work with. You can also use other fabrics like flannel or batiks for a different look and texture.
6. Can I use more than two colors in my Jacob’s Ladder Block? Yes! While the traditional block uses two contrasting colors, you can use as many colors as you like. Mixing different prints and solids can give your quilt a more modern, eclectic feel.
Join our VIP broadcast list and gain access to exclusive patterns, all for free. As a VIP member, you’ll receive the best patterns daily, delivered directly to your device. ✨📱 It’s a unique opportunity to stay up-to-date with the latest trends and designs, curated just for you. Don’t miss out on enhancing your projects and discovering new inspirations with the best patterns every day! 🎨🔝
Conclusion
The Jacob’s Ladder Block – Quilt Tutorial is a fantastic project for quilters of all skill levels. Whether you stick with a traditional two-color scheme or experiment with bold prints and colors, this block offers endless creative possibilities.
With just a few simple steps, you can create a stunning quilt that looks complex but is surprisingly easy to make. We hope this tutorial has inspired you to try your hand at the Jacob’s Ladder Block. Please leave your feedback and suggestions in the comments below—your input helps us create even better tutorials in the future. Happy quilting!


